Basic computer setup and cabling
Having learnt about various devices and how they function,it is important to familiarize ourselves on how to setup a computer.
Before attempting to carry out any setup activity,observe the following precautions should be observed.
1. Disconnect all devices from power source before starting to work on them.
2. Do not work on any peripheral device without the guidance of the teacher.
3. Never work alone because you may need help in case of an emergency.
4. Discharge any static electricity that might have built upon the hands by touching an earthed metallic object and then wearing an anti-static wrist member.This is because your body can hold as much as 200 volts of static charge that can damage sensitive components on the motherboard.
Tools and other requirements
The tools and requirements include;
1.Different sizes and shapes of screwdrivers.
2.Anti-static wrist member.
3. Pliers with narrow nose.
4. Manufacturers manuals for motherboard and other components.
5. Necessary software.
6. A dismantled system unit.
7. Peripheral devices.
8. Interface and power cables.
9.Any other as needed.
Connecting devices to the motherboard
The following are steps for connecting devices to the motherboard.
Step 1: Identifying motherboard slots and components.
Before you connect any device to the motherboard,carefully study the manufacturers manual in order to identify the components labeled in
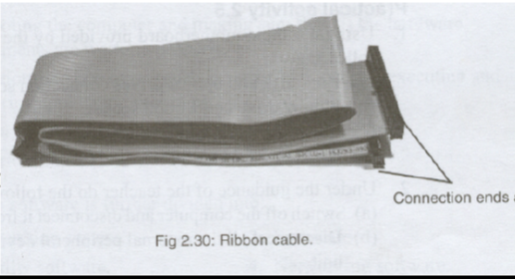
Step 2: Connecting the hard disk,floppy drive and optical drive.These devices are connected to the motherboard using special ribbon cables like the one.
The following instructions should be observed while connecting the devices:


1. Wear anti-static wrist member to discharge any static charge on the body.
2. Check that a free drive bay exists to hold the disk drive.
3. Slide the disk into its bay and screw it in to place.
4. Ensure that there is a free power connector from the power supply unit and connect it to the drive.Notice that it is designed to fit in its socket in only one direction.
5.Identify pin 1 as labeled on the drives socket and match it with the red or brown continuous line of the ribbon cable.Most cables will only fit in one direction.
6. Connect the cable both to the drive then to the motherboard.
7. Repeat this for all the drives.
8. If installation is complete replace the system unit cover.
Step 3: Connecting other peripheral devices
To connect a device to the system unit,you need to identify its port and interface cable.
1.Gently and carefully connect the interface cable of each device to the correct port and to the device if it is not already fixed permanently.
2. Connect the computer to the power source and switch it on.
3. Observe bootup information on the screen to see whether power-on-self-test (POST) displays any error message.
4. A successful boot means that the computer was properly setup.
NB: If the computer is completely new,programs have to be copied(installed) on the hard disk.